Food Photography and Styling Tips
Knowing where to start when it comes to food styling is probably one of the hardest areas of food photography. While all the technical stuff to do with cameras might be challenging, there’s normally a black and white answer on how to achieve something… but when it comes to food styling, just like with any art, it becomes a lot more subjective.

But fear not! With just a few pointers, tips and tricks, you can start becoming more consistent in your food styling, so that you can confidently set up your food to look irresistible in your own personal style.
In today’s post I’m going to share with you my top five food styling tricks that I wish I’d known when I started food photography, so you can cut out all the trial and error and start seeing noticeable improvement in your food photography today!
When I started food photography 10 years ago, learning good food styling was something I struggled with a lot. I had a vision in my head of what I wanted to achieve, but things didn’t always turn out the way I wanted them to.
1. Good Lighting Is Essential: Try to always shoot in natural light. You’ll find that it is softer and smoother than studio lights. To do this, shoot close to a window and never in direct sunlight. If the sun is bouncing onto a surface, soften it out with a curtain or a white cloth, or simply wait until the sun has moved.
2. Use a Reflector: You can use basically anything that bounces light; white cardboard or small mirrors work great. If you’re willing to invest, go for a multi reflector. It will allow you to reflect both warm and cold light and is super handy to bring along to shoots.
3. Use a Tripod: This will free up your hands to move things around and allow you to style your picture more easily. Choose a steady tripod — Manfrotto and Induro are super solid brands.
4. Try Different Backgrounds: Test out different colors and textures. Wood lends itself to a rustic look, while black and white tables and backgrounds add elegance. Find the in-betweens by adding tablecloths and napkins.
5. Your Lens Matters: Use a long focal length, such as 50mm, 85mm or 100 mm or chose a macro lens for close ups. Wide angle lenses will make the scenery crooked, lines won’t add up and the food becomes less appealing.
6. Shoot in Manual Mode: This will give you total control over your image, e.g. depth of field and ISO.
7. Be Precise: Pay close attention to what is in focus and experiment with aperture. Some images look great with a shallow depth of field, while others function better with a longer depth of field.
8. Experiment With Angles: Think about how you are going to use the image. Shoot both vertical and horizontal images of the same dish so they’ll fit all forms of media. If you’re aiming for your images to be pinned on Pinterest, shoot verticals. They take up more space and therefore get more attention in the Pinterest feed.
9. Use Lights When You Need Them: Never shoot in a dark restaurant without using lights. Otherwise food looks dark and often red, which is not appetizing. During the day, move your plates closer to the window to make use of natural light. At night, you can fire a flash into a reflector or white cardboard to get softer light. Never fire flash directly at the dish!
Food Styling Tips
1. GatherProps: Collect as many plates, bowls, cutlery and tablecloths as possible. Be creative and look in your grandma’s kitchen, go to flea markets and invest in some basic things from designers you like. Mixing old and new designs gives your images a personal touch.
2. Build Your Scene: Choose one thing and then add in more elements one by one. For example, start with a tablecloth or a plate and then add other props to the image as you go.
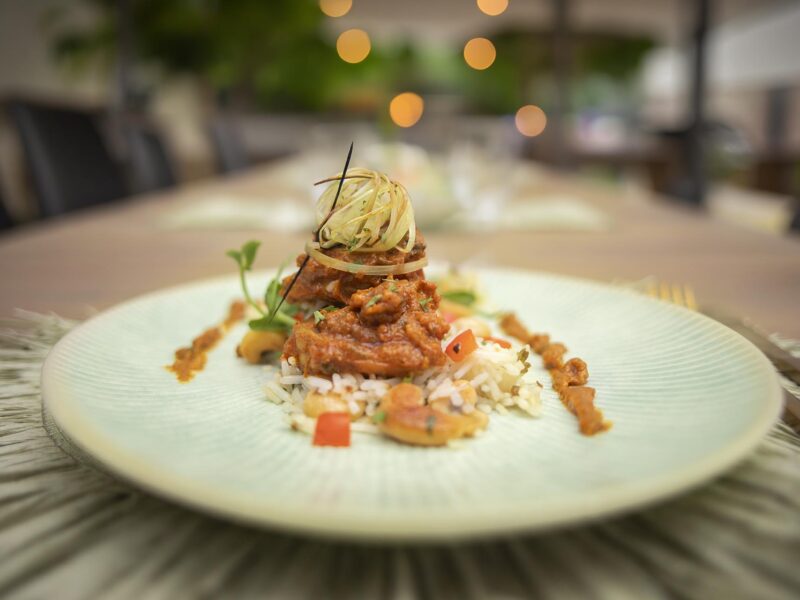
3. Less Is More: Use less food on the plate than you normally would. Large amounts can more easily lose their shape.
4. Garnish the Food: Sprinkles of salt or chopped parsley are easy tricks to make what might have been a boring-looking dish appear remarkable.
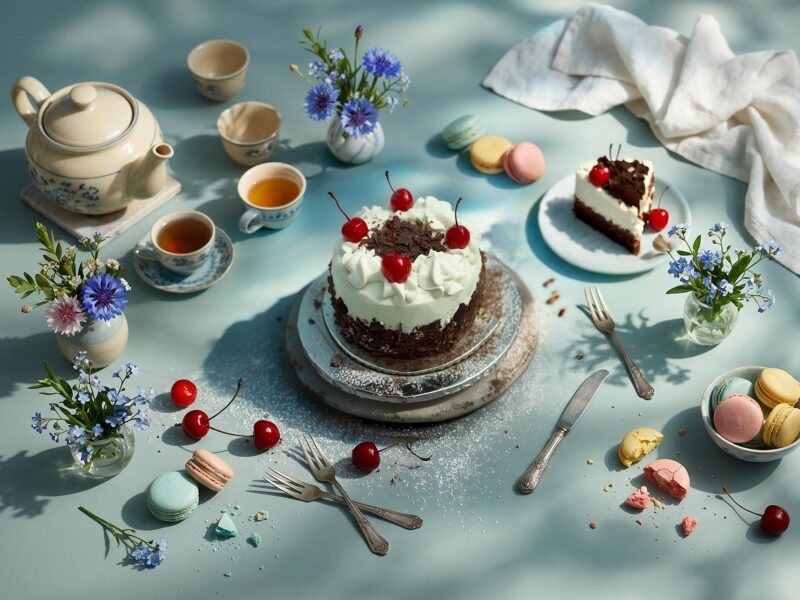
5. Make Your Pictures Move: Use cutlery, napkins and even human hands to indicate movement. This doesn’t mean placing things randomly. Think about how the picture is taken and from what angle the viewer sees it. Place cutlery and napkins by the plate like it is meant for the viewer to pick up and use. If you use someone’s hand in the picture, make sure it doesn’t cover the food or steal the spotlight from the dish you’re styling.
6. Make a Mess With Purpose: Keep the styling and image alive by adding a little mess such as crumbs and herbs.